7 minutes
Installing Hugo on Ubuntu 18.04 LTS over WSL
The worst part of returning back to the game is the felling that everything you simply does not work or wil work poorly. Well, sometimes by “poorly” is even a satisfaction on itself compared to not working at all.
A long time ago I had some pages I have created using googlepages. It was all nice and well until google decided to change a bit the rules. Demotivated, I just left the everything getting dust while promising myself one day I would find the perfect solution for google’s tyranny.
Hopefully this day has come.
Have you ever asked yourself what should you do to get a website all nice and dandy, without limitations of tyrannic providers just waiting to gain on your traffic?
Well I might have the solution you’ve been looking for.
Just bear with me for glorious 14 hours of hard work and you’ll have it! ;-D
Just kidding. This post will be the first of a series on how to do to get everything working on Amazon,a long with an unbeatable argument on price.
Yep, freedom is not for free, :-p sadly. But in this case it costs much less than what you might expect.
Step -2. First things first
When I decided to start, I knew I would have to pass by the unforgiven linux installation. Last time I had to install linux, we had to make partitions on the disk, to prepare the terrain, make backups from our hard drive and so on.
A pain where the light does not usually shine for many of us.
So I thought what else do I have available?
Well it is 2020 and things could not be more straightforward.
If you have Windows 10, Microsoft has you back covered. Relax.
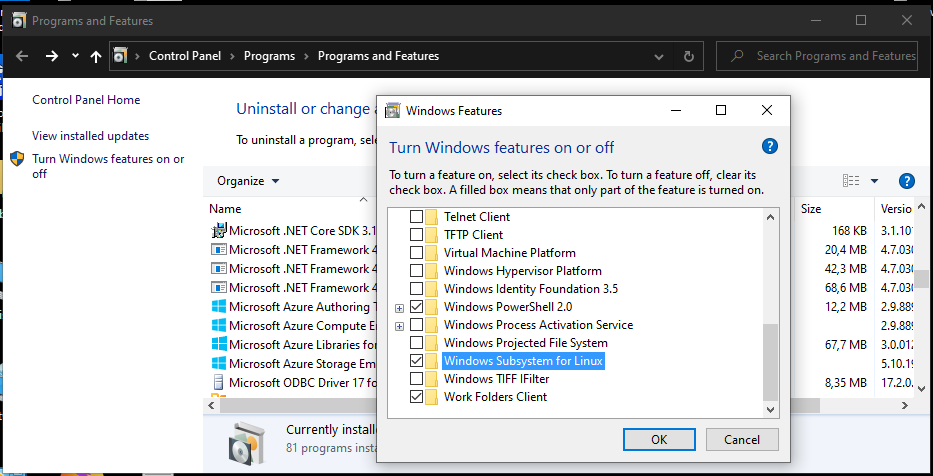
I just had to install a mysterious feature known as WSL.
You can install it directly on your Windows 10, just open “Windows Features” and look for “Windows Subsystem for Linux” as shown on the picture.
Step -1. Install linux on Windows!
Wow? What was that? Aren’t we making this transition too fast?
It turns out, no.
Because Microsoft has got your back, man or girl or … idk. Better stop. 😖
What is really important is that it has became so easy that you can install it from your Windows Store!
How awesome is that?
Open you Windows Store. If you don’t have a Windows Store icon, you can still do it if you press the Windows key + R on your keyboard, type “ms-windows-store:” without the quotation marks in the Run box that appears, and then press Enter.
On Windows Store interface, just go on the search button and type “linux”, you’ll see something like this:
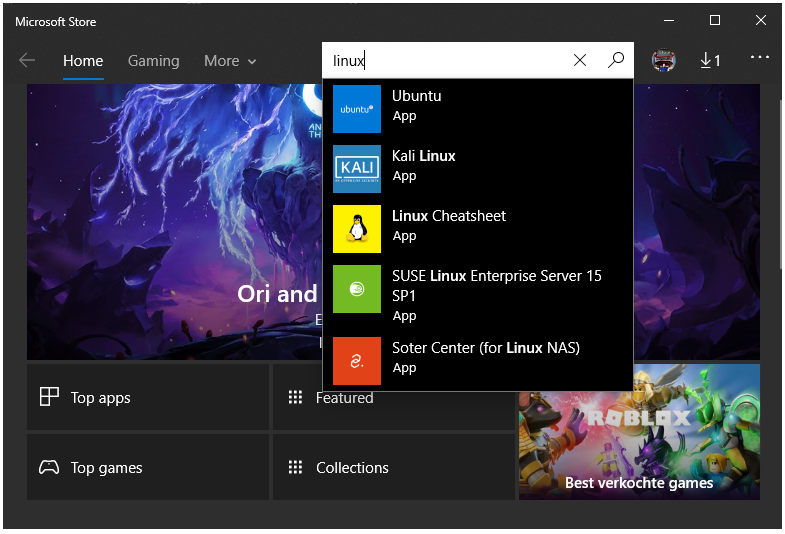
Once you’ll hit Enter, you’ll have all available Linux flavors ready to run on WSL.
In our case, we’ll chose one of the most popular flavors, which I personally consider the best one for new comers suffering from Packagenic Dependency Alergitus. It is a made up illness, but I bet you knew, right? … No? Well.. let’s move on.
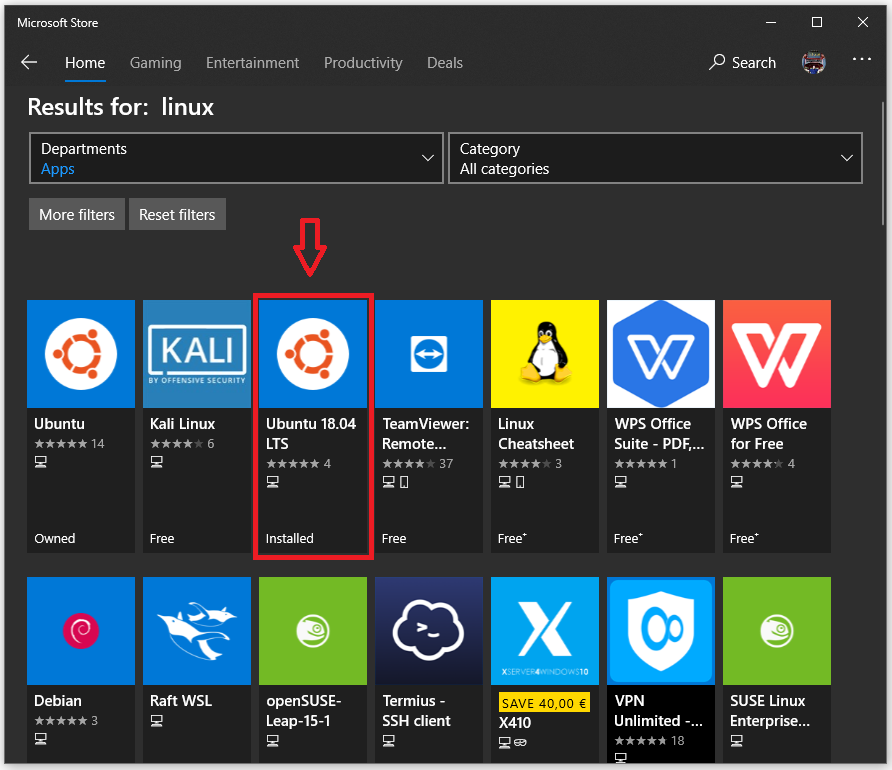
From these, you’ll chose Ubuntu 18.04 LTS. I know some may want to unleash the dogs of hell on me for what I about to say, but Ubuntu is the best flavor for those seeking simplicity no or few hassles whatsoever doing anything else but going straight to their goals.
Install it.
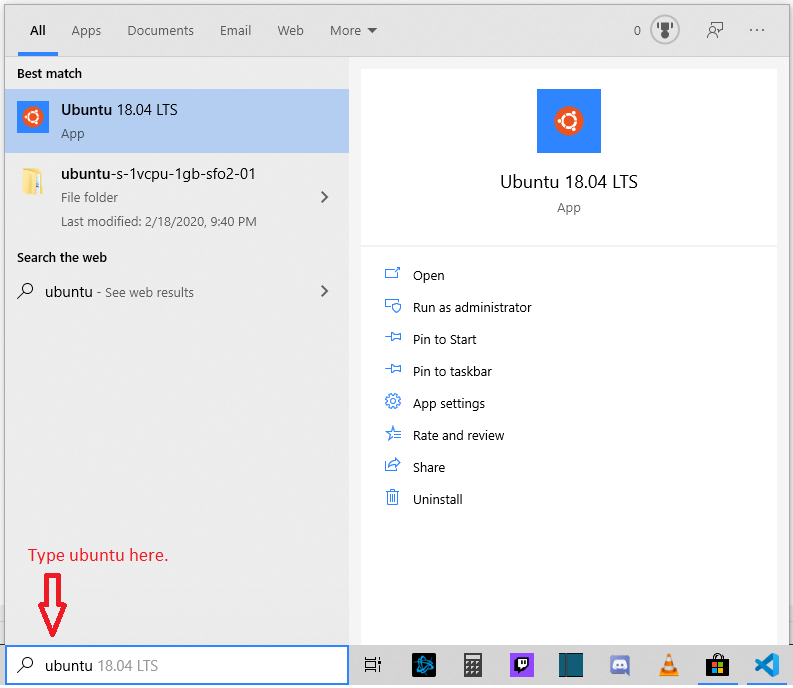
From that point on, you do can launch it directly by searching for your installed linux using Windows Search Bar.
But wait, there is more. Microsoft has really given into a lot thought about and made it possible for linux flavors installed over WSL to truly coexist and put together the best of both worlds.
Before we jump and get our hands to Hugo itself, there is another fancy and useful tool Microsoft has made available, it is called New Windows Terminal.
Step 0. New Windows Terminal
Suddenly it is like Microsoft has awaken and decided to atone for its sins. After years of negligence against those seeking refuge in linux to make a better world, the company somehow decided that integration and popularization is beneficial to Microsoft in the medium-long term than its former policy of putting under the carpet everything else in the world to focus only on in its own yard.
Although I will be using the New Windows Terminal, it is not mandatory for you to install it. Feel free to skip this part if you want.
New Windows Terminal is not a production feature yet and it is in its early stages. Although I would not recommend it as something scalable to rely on, on production stages, I would say that it is still more than enough as it will give you the best seemingly interaction between all systems that use WSL and have their on shells.
Without oversimplifying, the best way to describe it is as a tool that allows you to switch between shells on your system, be them from any Microsoft Windows technology or anyone else’s, as long as they use WSL to interact with your host system.
Since the goal of my post is Hugo, here a link that will provide more info about the New Windows Terminal.
Step 1. Install Hugo
If, like me, you are a beginner on the dark arts of linux and content production black-magic-meddling, you better read this part carefully.
Since everything is available on ubuntu and particularly, for LTS, or at least for 18.04 LTS, you might want know that Hugo version for this ubuntu release is not compatible with several Hugo themes available.
It is a good idea to check for your choice theme Hugo’s version and then target on installing that particular version.
I learnt this after great pain in places where the sunlight doesn’t shine.
If you ignore this, you’ll still be able to install everything, there will not be a single feedback from ubuntu 18.04 LTS about any incompatibility problem whatsoever.
It will only to discover after a lot of frustration, unclear and scarce help over the web that you should have done what I just told you.
In my case, I have chosen hello-friend-ng as my theme.
If you feel you need to see more, take a look into the complete list of Hugo themes .
The version of Hugo I have installed is Hugo was v0.66.0, for linux amd64.
Distinction between processor architecture is relevant. You should prefer to install a release that matches your linux platform.
In order to discover, which architecture are you using, just open terminal on ubuntu and type:
sudo uname -i
If you get
x86_64
If you have got anything else and you do not have a clue about what it is and you do want to know more, then a good starting point would here: A list of all hardware platform can be found here
Then go to Hugo build tags or go straight to the latest hugo release and look for the build/release that suits your system. In my case, it was hugo_0.66.0_Linux-64bit.
As I said earlier, if you rushed into apt-get to install hugo for ubuntu 18.04 LTS, you may want to uninstall it.
sudo apt-get remove hugo
Since we can not rely on the hugo that comes with ubuntu 18.04 LTS, we have only two options to install hugo.
The first is Snap, which I personally consider a non-reliable method as it presents a number of issues and requires multiples dependencies. If you are comfortable with Snap, please go ahead and skip this part.
The second one is by downloading and installing hugo from ‘.deb’ package:
wget https://github.com/gohugoio/hugo/releases/download/v0.66.0/hugo_0.66.0_Linux-64bit.deb
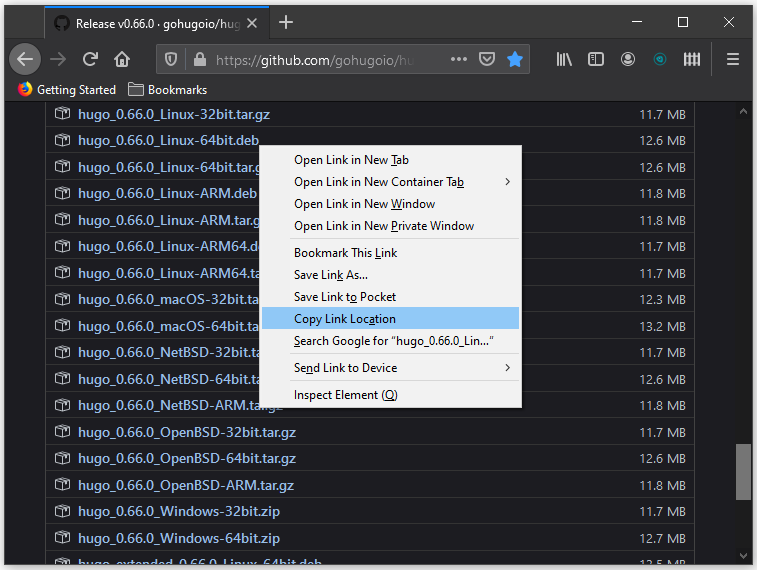
If you want to know how to obtain the link used with wget, just go to your release page, in my case 0.66 .
And do a right-click over the file you want to download; from the context menu, select “Copy Link Location”.
When the installation packages have been downloaded, just install the package:
sudo dpkg -i hugo_0.66.0_Linux-64bit.deb
If you would like to remove files downloaded to install hugo, here it is:
sudo rm hugo_0.66.0_Linux-64bit.deb
Finally you can check for hugo’s version:
  sudo hugo version
  //or just
  hugo version
That is all for the moment folks!
Hugo is ready to run, but if you still need an extra help make it run with the dream theme of your choice, then you might want to check my next post Installing Hello-Friend-NG on hugo .